Beginner's Guide To Raising Baby Chicks
March 27, 2022
So you've decided to start raising chickens!
I assume you've checked with your town or municipality and know the rules as far as how many chickens you are allowed, if you need a permit for either the chickens or their coop (or both), if you can have roosters, etc.
And now you're ready to get started.
Raising baby chicks isn't difficult. They really just need to be kept warm, safe, and well fed and watered.
But first you are going to need to find some chicks to buy!
Spring is the most common time to start raising chicks because while they need to start off in the house under a heat lamp, by the time they have grown in their feathers and are ready to go outside around 6-8 weeks old, the weather should be warm enough.
If you are only looking for hens (or female chickens), then your best best is to order them from a reputable hatchery such as Meyer Hatchery They offer "gendered" chicks (that means you can choose either females or males) and guarantee a 100% accuracy rate.
They have a wonderful selection of various breeds, let you mix and match, and only require a low minimum number of chicks purchased per order (often just three).
They will ship your chicks to you anywhere in the country; you just go to your local post office to pick them up when they arrive.
Another option is to visit your local feed store. Depending on the store, they might have the chicks separated by gender and breed, or they might have them listed as "straight run" which means the males and females are mixed in together.
If you definitely don't want roosters, you will want to avoid the "straight run" tub!
Craig's List or a local farm are also places to check for baby chicks, but you will be taking your chance in many cases as to not only the breed but the gender you might be getting.
You might not end up with true purebred chicken breeds, but if you're just looking for some baby chicks that will grow up to be nice laying hens for you, that's likely going to be an inexpensive source for baby chicks.
Before you bring your chicks home, you will want to assemble some supplies for them. All of these items can be found at your local feed store, or online from Amazon.com.
- Brooder
- Heat lamp with red bulb (or Brinsea EcoGlow)
- Small thermometer
- Rubber shelf liner
- Pine shavings (optional)
- Chick feed
- Chick feeder
- Chick waterer
- Marbles
- Clumps of dirt/grass
- Small branch
- Sugar/electrolytes
I have been raising chickens (and raising baby chicks) and have learned a few things along the way. My method is inexpensive, more natural than most methods, and my chicks are always happy and healthy and grow up to be beautiful chickens.
So hopefully this will give you some ideas for setting up your brooder!
Brooder Box:
Your chicks will need to live in a in a box or other container called a "brooder" for the first few weeks. You can use anything from a cardboard box to a plastic tote to a metal wash tub to a puppy playpen as a chick brooder. It just needs to keep them contained and safe from drafts, family pets, children or other household dangers.
I like to use a
dog kennel. It's easy to clean, sturdy, and nice inside. The top pf your brooder should be covered because it won't take your chicks too long to figure out how to flutter and flap and get over the top and escape!
A quiet room in the house such as a mudroom, laundry room or spare bedroom is a good place for the brooder. Somewhere easy to keep tabs on your chicks but where any dust or smell won't bother you.
Space:
When you first bring your baby chicks home, they will be quite small and won't need much space. It's actually a good idea to keep them in a small-ish area at first because that teaches them to stay under the heat lamp, prevents chicks from getting chilled who wander away from the heat, and also makes it easier for them to keep the area warm with their collective body heat.
But chicks grow pretty quickly, so you need to be ready to move them into increasingly larger brooders. One option is to start them in a larger brooder, but section off one end for them, then gradually move the barrier to give them more space as they grow.
Day old chicks only need about 6 square inches of available floor space apiece in the brooder apiece to start. Only an area that measures about 2 inches x 3 inches per chick, and then allow for extra room for their feeder, waterer, a small dust bath and maybe a miniature perch or branch.
So if you start with 5 chicks, for example, they would need to be in a brooder box that is only 30 square inches, or 5 x 6 inches, of empty floor space - then add on extra for the other things I mentioned that need to be in the brooder.
But within a day or so, your chicks will get active and grow out of this small space and by the time they're two weeks old, you should allow for closer to a square foot per chick, which should be plenty until they're ready to go outside around 8 weeks old, weather permitting.
So those same 5 chicks will need 5 square feet of brooder floor space. A brooder box that measures 2 feet x 3 feet should be a good size for 5 or 6 chicks for the first 8 weeks of their life.
Heat:
Since your baby chicks can't keep warm by themselves until they have grown in feathers (usually around 8 weeks old), they will need to be under a heat lamp.
A red bulb is preferable to a white one because it can reduce aggression and pecking issues, although I do like to use the white light during the day and the red light at night. But you can use the red bulb only if you want.
Note: It's a good idea to keep a spare bulb on hand in case the one you're using burns out. That's another reason why I like to use the red/white combo, so I always have a back-up just in case.
The heat lamp needs to be left on 24/7 to keep the chicks warm. But the temperature in the brooder box should be lowered each week to gradually get the chicks accustomed to the outside temperature.
The heat bulb should be set up at one end of the box and the feed and water set at the other end. That gives your chicks the opportunity to move away from the heat if they wish, or move closer if they're cold, and prevents the water from getting hot. Chickens don't like to drink hot water. Room temperature is optimal.
- 1st week - 95 degrees
- 2nd week - 90 degrees
- 3rd week - 85 degrees
- 4th week - 80 degrees
- 5th week - 75 degrees
- 6th week - 70 degrees
- 7th week - 65 degrees
- 8th week - 60 degrees
The best way to figure out of your chicks are warm enough is to watch them. They shouldn't be huddled under the light chirping loudly, but instead scampering around the brooder, peeping quietly. If they are cold, lower the heat lamp.
It's very important to keep the chicks warm because without feathers they can't retain their own body heat. If they get chilled, they often can't recover and will die. They also risk suffocation if they get cold and all pile on top of each other in one corner of the brooder.
So be sure the box is warm enough for them :)
It's pretty uncommon for the temperature in the box to be too hot. But if the chicks are pressed against the sides of the brooder trying to get away from the heat, panting or holding their wings out, they're too hot, so raise the heat lamp a bit.
I've actually read that in Asian countries, they like to keep the temperature in the brooder close to 100 degrees for several weeks. They believe that results in extremely heat-tolerant chickens as adults. While I don't necessarily recommend that, I do know it's important to keep chicks warm.
If you have them in an area of your house that is chilly, it's a good idea to cover part of the top of the brooder box with a towel or blanket to keep even more of the warmth inside the box.
Happy, healthy chicks will be active and curious, although baby chicks do sleep a lot, just like any other babies!
Bedding:
Some paper towels or old bath or hand towels on the bottom of the brooder for the first few days will keep the chicks from slipping (never use slick newspaper or let them stand on the plastic bottom, it's too slippery for little feet and
can lead to spraddle leg).
Or instead, I prefer to use a piece of rubber shelf liner over a few layers of newspaper. That works really well, isn't wasteful and is very easy to replace and clean. The newspaper soaks up and absorbs any water spills and the shelf liner is a nice grippy surface for the chicks that is washable and re-useable.
After a few days once the chicks have figured out what's food and what's not, you can add some pine shavings, although they do tend to be super dusty. And honestly, unnecessary.
So I prefer instead to skip the shavings and just use dirt/grass clumps, which the baby chicks LOVE incidentally, and are so much cleaner and neater than shavings. The chicks will nibble on the grass and scratch in the dirt.
The brooder litter will need to be cleaned out every day or so as needed. Simply put the chicks back in the box they arrived in, dump out the brooder into the trash or compost pile, hose off the shelf liner and refill with new litter.
I cut two pieces of shelf liner so I have a dry one to use while the other is drying.
Water:
When you first bring your chicks home (or pick them up at the post office), they might not be hungry but they will most likely be thirsty.
As you put each chick into the brooder, first dip their beak into the waterer of room-temperature water (for shipped chicks, adding some sugar water, honey or electrolytes for the first day or two is helpful). This teaches them how to drink and shows them where their water is.
Since they are a bit top heavy and can easily drown, putting some stones or marbles in the water trough for the first week or so is a good idea. The shiny stones also encourage the chicks to investigate and hopefully drink a bit more.
The chicks should have access to fresh, clean water 24/7 while they're in the brooder.
After the first day or so, you can add a few drops of apple cider vinegar to your chicks' water every few days. Apple cider vinegar will improve their overall health, boost their immune, respiratory and digestive systems and aid in nutrient absorption.
Feed:
Chicks need to eat chick starter feed for the first eight weeks. You can purchase a chick-sized gravity feeder, a small trough feeder, or just use a small dish or bowl. You
can even use half an egg carton and put the feed in the compartments.
Or, as you can see I have done, you can glue saucers to small teacups or espresso cups and use them. They're super cute and the chicks seems to enjoy eating out of them!
Whatever you do, be sure there's enough room for all, or virtually all, of the chicks to eat at the same time. They seem to like to all do things together and you want to be sure they are all getting enough feed and water.
I believe that keeping the chicks in a clean environment with enough space that they're not crowded, and adding a few things (like apple cider vinegar, oats and garlic) to boost their immune systems is enough protection for them.
Also by adding the grass and dirt to the brooder, that's exposing them to the outdoors and helping the strengthen their immune systems.
I also offer my chicks fresh, minced or crushed garlic. It has wonderful health benefits for them including improving respiratory and immune system health. I find that by offering it when they're young, they'll continue to eat it for life.
I also add a bit of raw oats to my chicks' feed. They like them, oats are a healthy addition to their diet and the raw oats can help to clear up or
prevent a condition called "pasty butt" that chicks (specifically those that are shipped) can suffer from.
Chicks should have access to their feed 24/7 while they're in the brooder, just like the water.
Grit:
It's also a good idea to fill a small container with some coarse dirt. Like adult hens, baby chicks need the "grit" to help them digest what they eat. If all you are feeding them is chick feed, then technically they don't need the grit, but I suggest offering it anyway.
That way, you can give your chicks the occasional treats (such as fresh herbs, weeds, scrambled eggs or leafy greens) without worrying. They will also enjoy practicing
dust bathing in it.
If you have room in your brooder box, a small branch or stick will give your chicks the opportunity to practice balancing and perching. They'll enjoy hopping on and off the branch.
So there you have the basics of raising baby chicks in the brooder box. As your chicks grow bigger, they'll need more space, so be sure you are ready!
Moving Your Chicks Outside:
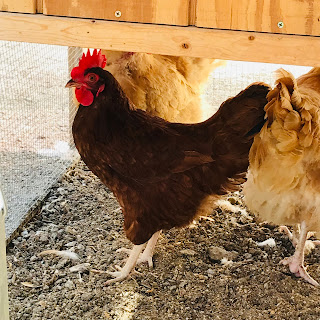
Your chicks will need to be in the brooder under the heat lamps for about 6-8 weeks, depending on where you live and the time of year, but by the time they have grown in their first feathers, they should be able to at least start spending warm days outside, then coming back inside at night to sleep.
And as long as the temperatures aren't dropping much below 60 degrees by the time they're eight weeks old, they should be fine outside in their new coop and run.
While this information will help you get started with your first batch of baby chicks, there's still more to learn when it comes to raising backyard chickens. Have fun raising your new baby chicks!


Comments
Post a Comment